Würfel gibt es im Internet in Hülle und Fülle. Unterschiedliche Größen, Farben und Formen - es scheint, als ob es nie genug davon gäbe! Sie wollen aber nicht, dass Ihre Würfel so aussehen wie die der anderen. Deshalb ist es eine gute Idee, Ihre eigenen Resin-Würfel zu Hause herzustellen, anstatt sie online zu kaufen.
Es ist einfach und macht Spaß, und Sie können es sogar zu einer freundschaftlichen Aktivität machen, wenn Ihre Freunde mitmachen wollen.
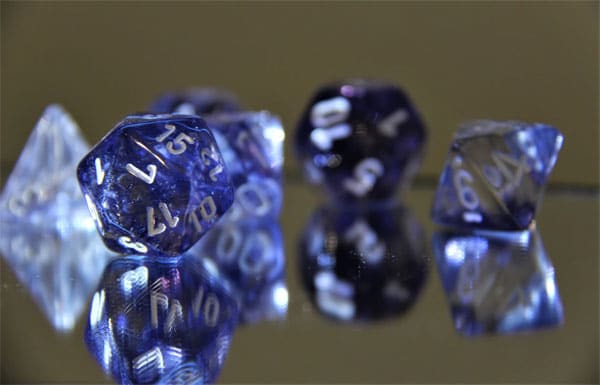
Sie können Ihre Würfel in Farbe, Form, Symbolen und Verzierungen individuell gestalten oder sie sogar an Ihr Lieblingsbrettspiel anpassen. Sie können auch so viele Würfel herstellen, wie Sie wollen, solange Sie die Materialien dafür haben! Es mag etwas mehr Mühe und Schweiß kosten, aber wir versprechen Ihnen, dass die Vorteile die Nachteile bei weitem überwiegen.
Materialien für die Herstellung Ihrer Harzwürfel
Sammeln Sie Ihre Materialien und fangen Sie an, Ihre eigenen Harzwürfel zu gestalten!
Im Allgemeinen benötigen Sie die folgenden Materialien, um mit der Herstellung Ihrer Resin-Würfel zu beginnen:
- 1 Satz Meisterwürfel Ihrer Wahl
- Atemschutzmaske
- Silikonkautschuk (oder Epoxidkitt)
- Ein sauberer Raum zum Arbeiten
- Eisstäbchen zum Umrühren
- Solobecher (Mini) oder rechteckiger Behälter
- Messbecher
- Wiederverwendbare oder Einweghandschuhe
- Auswahl an Verzierungen für Ihre Würfel, wie z. B. Hobby-Farben
- Exacto-Messer (oder ein anderes scharfes Schneidewerkzeug)
- Sculpey Ofen-Backton
- Harzpigmente wie Glimmerpulver oder Alkoholfarben
- Saubere Zange
- Schleifpapier
- Hochwertiges, klares Epoxid-Gießharz
- Zahnstocher
- Handbohrmaschine
- Superkleber
- Heißklebepistole
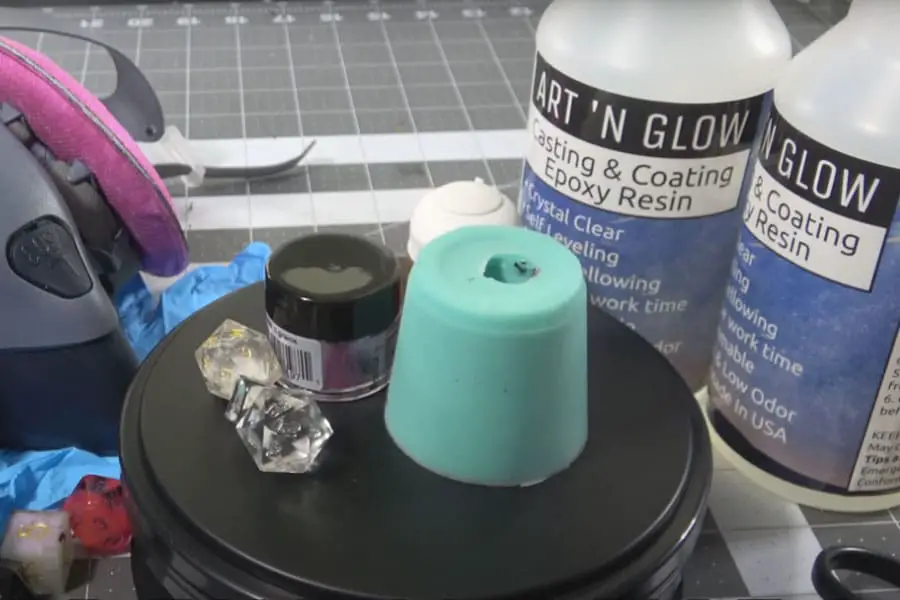
Das beste Gießharz für die Würfelherstellung
Wenn Sie Ihre Würfel aus Kunstharz herstellen, sollten Sie Gießharz verwenden, das nachweislich hochwertige Ergebnisse liefert.
Art 'n Glow Clear Casting and Coating Epoxy Resin - Beste Wahl
- Sicher, erschwinglich und einfach in der Anwendung
- Ideal für die Herstellung von Würfeln aus Resin
Das Art 'n Glow Clear Casting and Coating Epoxy Resin eignet sich hervorragend für die Herstellung von Resin-Würfeln. Es ist sicher, erschwinglich und einfach in der Anwendung. Außerdem ergibt es kristallklare Würfel. Was uns an diesem Produkt besonders gefällt, ist, dass es selbstnivellierend, selbstentlüftend und geruchsneutral ist. Es ist definitiv das praktischste aller auf dem Markt erhältlichen Resin-Produkte!
Art 'n Glow ist auch resistent gegen das Vergilben durch Sonneneinstrahlung, so dass Sie sich keine Sorgen machen müssen, dass die Farben Ihrer Würfel durch das Sonnenlicht beeinträchtigt werden. Ein Nachteil dieses wunderbaren Produkts ist jedoch, dass das Harz weich wird und sich verformen kann, wenn es zu viel Hitze ausgesetzt wird. Wir empfehlen, Ihre Würfel an einem kühlen Ort zu lagern, um solche Vorfälle zu vermeiden.
Wie man Würfelformen für Harz herstellt
Wenn du alle Materialien gesammelt hast, die du brauchst, kannst du dich an die Herstellung deiner Würfelformen machen. Es gibt vorgefertigte Formen, die du online kaufen kannst, und wir werden in einem späteren Abschnitt darüber sprechen. Aber zuerst wollen wir dir zeigen, wie du deine eigene Form herstellst.
Wenn du deine eigene Form herstellst, kannst du das Aussehen deines Würfels individuell gestalten. Soll er Zahlen enthalten? Oder soll er andere Symbole zeigen? Welche Symbole möchtest du verwenden? Und wie viele Seiten soll er haben? Du kannst absolut alles machen, was du willst!
In diesem Abschnitt zeigen wir Ihnen, wie Sie Kappenformen (Squish-Formen) herstellen.
Kappenform (Squish)
Kappenformen sind ideal, wenn man einen ganzen Satz Würfel aus einer Form herstellen möchte. Wir mögen diese Methode, weil man dabei kein Loch in einen einwandfreien Würfel bohren muss.
Dazu brauchen Sie einen Behälter (mit genügend Platz, um einen ganzen Satz von D&D-Würfel):
- Ein Meistersatz Würfel
- Etwas Ton
- Packband
- Gummibänder
- Ein Zahnstocher
- Ein Exacto-Messer
- Silikongummi
Schritt 1
Nimm dein Würfelset und lege einen kleinen Kieselstein aus Ton auf die Unterseite jedes Würfels. Du solltest Sculpey-Ton verwenden, da er sich besser mit Silikon verträgt. Dieser Ton wird deinen Würfel am Behälter festhalten und verhindern, dass er sich bewegt, wenn du anfängst, dein Silikon zu gießen.
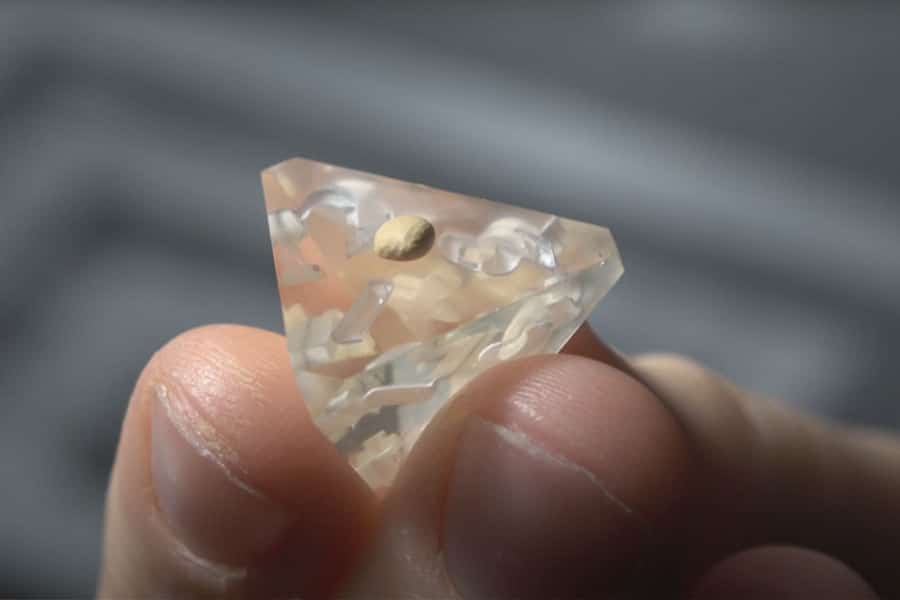
Die Knete sollte dünner als Papier sein, denn überschüssige Knete führt nur zu überschüssigem Silikon, was das spätere Herausziehen des Meisterwürfels erschweren kann.
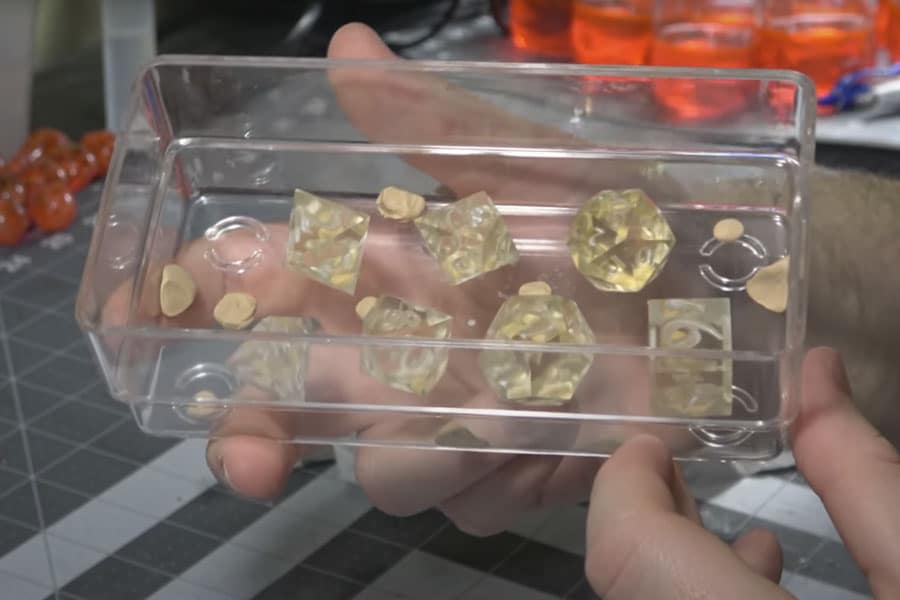
Schritt 2
Wenn du alle Würfel in deinem Behälter gesichert hast, kannst du mit deiner Sculpey-Knete Passermarken anbringen. Passermarken helfen dir dabei, dass der obere Teil deiner Form jedes Mal genau an der gleichen Stelle sitzt, sodass du sie nicht jedes Mal anpassen musst, wenn du Würfel herstellst.
Schritt 3
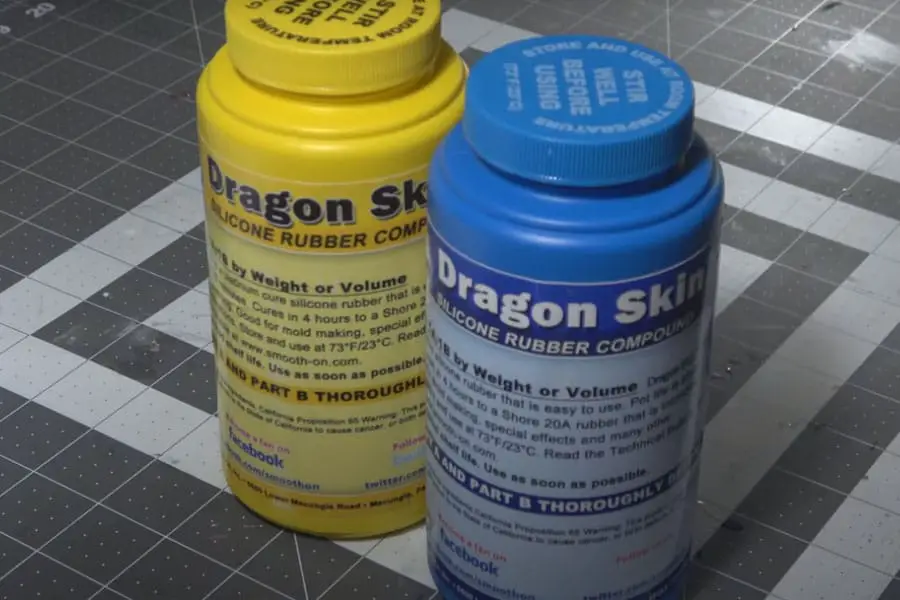
Nun ist es an der Zeit, Ihr Silikon zum Gießen vorzubereiten. Bei der vorherigen Methode haben wir SORTA-Clear verwendet, aber da Sie bei dieser Methode etwas grober mit dem Silikon umgehen werden, empfehlen wir Ihnen SMOOTH-ON Dragon Skin 20. Natürlich können Sie jede Art von Silikon verwenden, die Sie möchten. Aber die Tendenz ist, dass diese Formen leicht reißen können, also seien Sie vorbereitet.
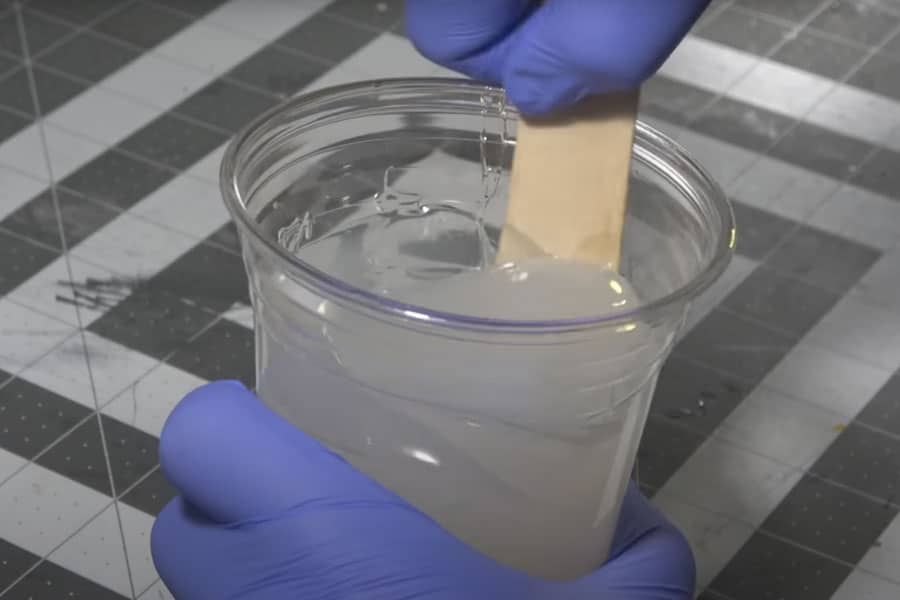
Messen Sie die Mischungen A und B im Verhältnis 1:1 ab und mischen Sie sie in einer Tasse oder einem Behälter. 5 Minuten lang mischen, bevor Sie die Mischung in den Behälter mit den Meisterwürfeln gießen.
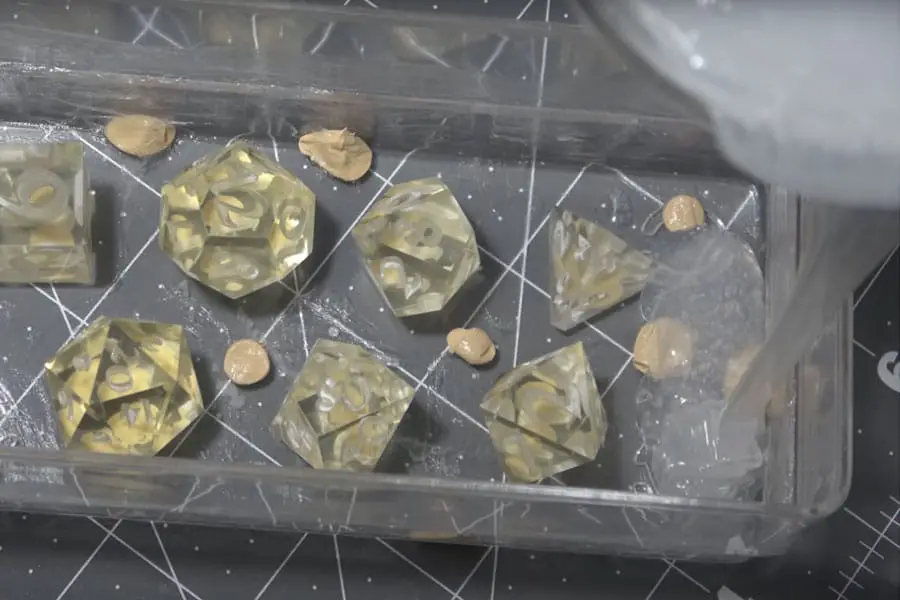
Schritt 4
Genau wie bei der Herstellung von Angussformen solltest du beim Gießen von Silikon für deine Kappenformen darauf achten, dass du so langsam wie möglich vorgehst. Dadurch wird sichergestellt, dass das Silikon alle Ecken und Winkel deiner Meisterwürfel bedeckt. Gieße nur an den Seiten und nicht direkt auf deine Würfel, da dies deine Form später ruinieren kann.
Stellen Sie sicher, dass die Oberfläche, auf der Ihre Form steht, eben ist, damit Sie nach dem Aushärten gleichmäßige Seiten erhalten.
Schritt 5
Sobald die Form ausgehärtet ist, können Sie sie aus dem Behälter nehmen. Nicht mit Gewalt herausdrücken - lösen Sie die Seiten mit Ihrem Exacto-Messer und ziehen Sie sie langsam aus dem Behälter.
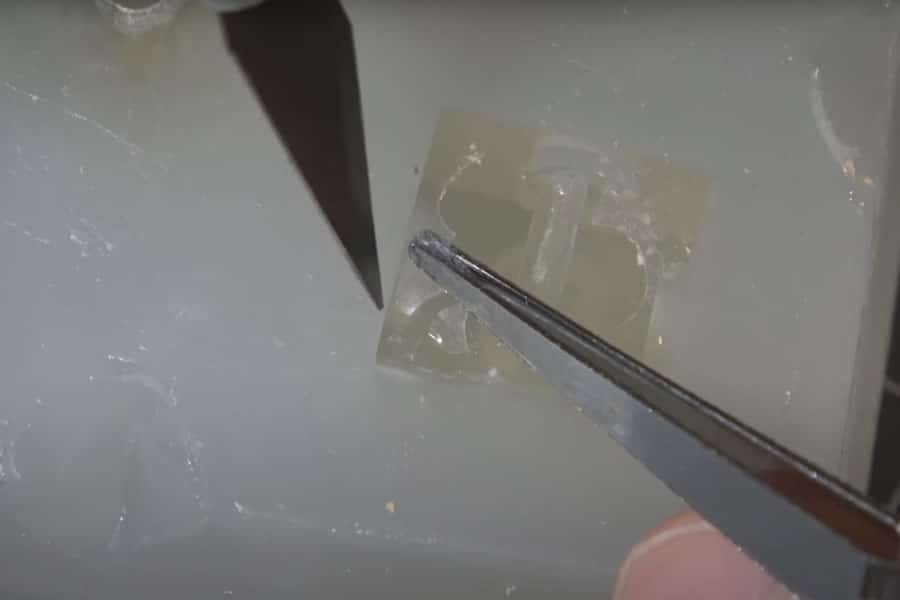
Nachdem du deine Form herausgeholt hast, kannst du damit beginnen, den Ton zu entfernen und das überschüssige Silikon von deiner Form zu säubern. Du kannst dies mit deinem Exacto-Messer, einem Zahnstocher und (wenn du sie hast) einer kleinen Zange tun, um überschüssiges Silikon zum Schneiden aufzuheben.
Sobald das überschüssige Silikon entfernt ist, kannst du die Oberfläche deiner Form säubern. Nimm die Würfel nicht heraus, da wir sie für die Herstellung deiner Formkappe benötigen. Fahre einfach mit einem Wattestäbchen über die Oberfläche deiner Form. Achte darauf, dass du dein Wattestäbchen in Alkohol tränkst, um eine wirklich saubere Oberfläche zu erhalten.
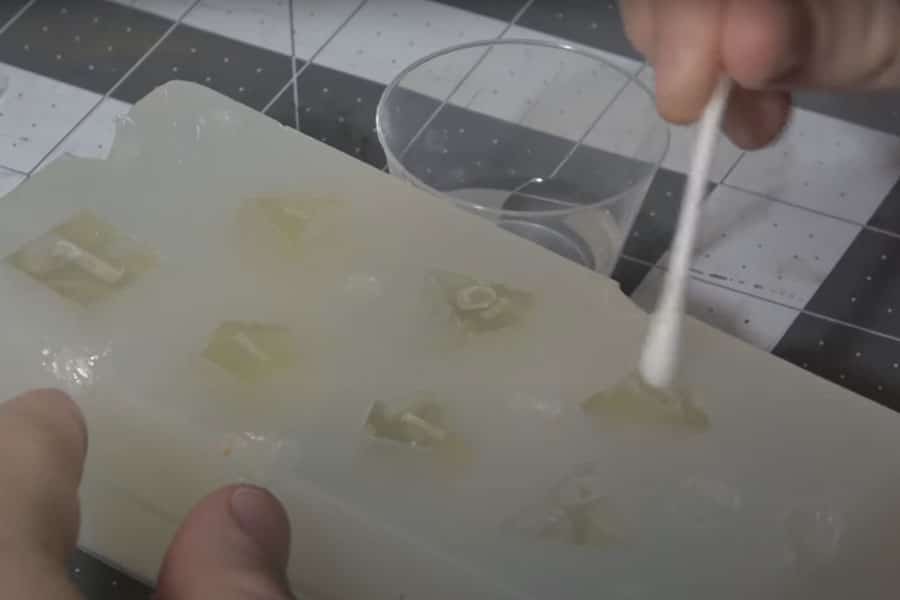
Schritt 6
Wenn alles sauber ist, tragen Sie Vaseline auf die Oberfläche der Form auf.
Sie müssen diese Stelle sauber halten, denn jedes Öl oder Gelee, das sich darauf befindet, verhindert, dass das Silikon haftet.
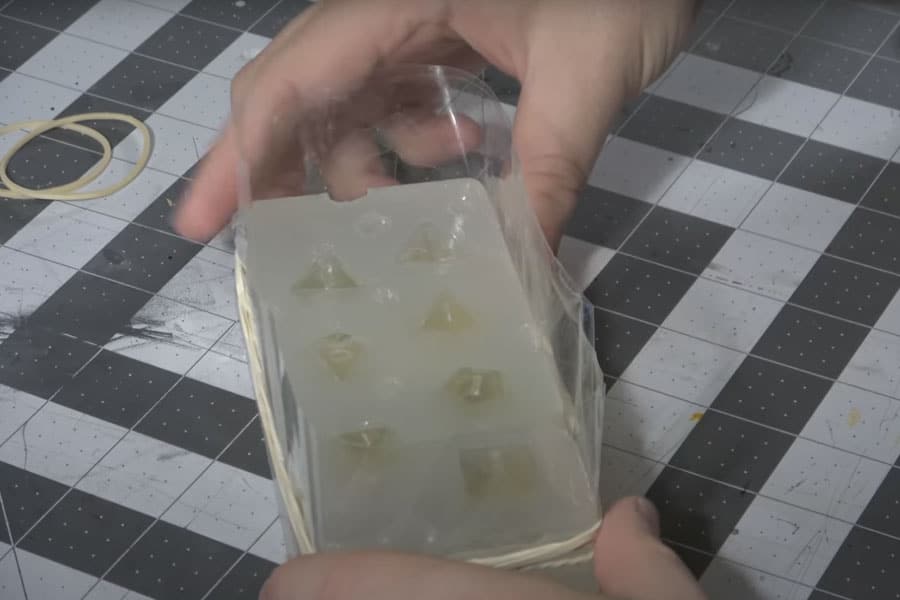
Sobald Sie die Oberfläche Ihrer Form eingefettet haben, nehmen Sie etwas Packband und legen Sie einen Damm für Ihren Formdeckel an. Sichern Sie den Damm mit ein paar Gummibändern.
Mischen Sie eine weitere Charge Dragon Skin 20 und gießen Sie sie auf Ihre Form. Wiederum langsam und lange, damit sie alle Oberflächen vollständig bedeckt. Stellen Sie sie auf einer ebenen Fläche beiseite oder stellen Sie sie zum Aushärten in einen Druckbehälter.
Schritt 7
Wenn Sie im vorigen Schritt genügend Vaseline verwendet haben, sollten Sie die Formkappe ziemlich leicht abziehen können.
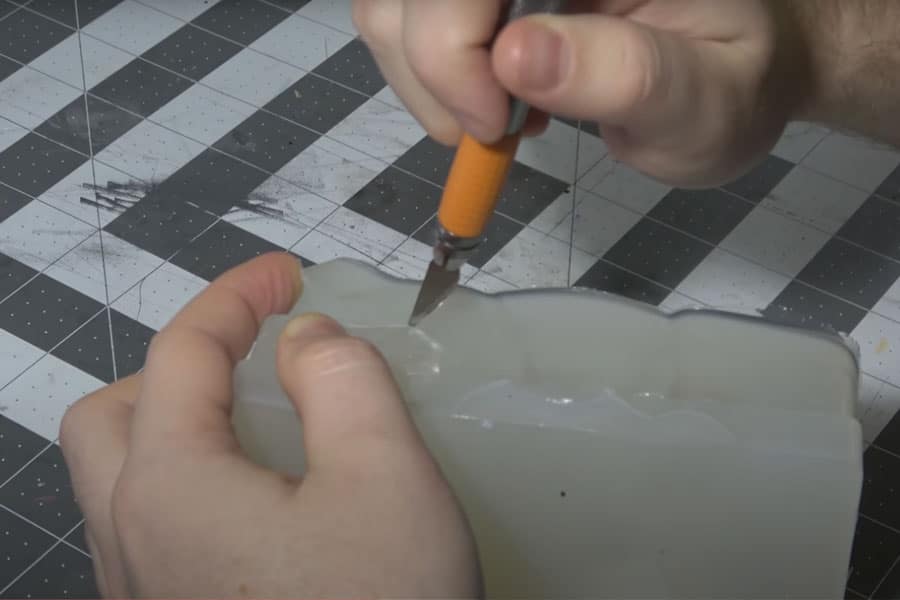
Jetzt kannst du deine Würfel herausnehmen und du hast eine Mützenform!
Die besten vorgefertigten Würfelformen für Resin
Wie wir bereits erwähnt haben, gibt es im Internet viele vorgefertigte Würfelformen, die für diejenigen von euch, die nicht so gerne mit den Händen arbeiten, sehr nützlich sein können. Hier sind unsere 3 besten Empfehlungen.
FUNSHOWCASE Würfelformen aus Harz - das Beste für Einsteiger

- Einfaches Design
- Hat eine glänzende Oberfläche
Die Resin Dice Molds von FUNSHOWCASE eignen sich hervorragend für Anfänger, da sie ein einfaches Design haben, das nicht so viel Aufwand in der Handhabung erfordert.
Ihr Epoxy Casting Kit enthält eine Gießschale und Würfelformen mit den folgenden Gesichtern:
- D4
- D6
- D8
- D10
- D12
- D20
- D24
Ein paar Nachteile haben wir bei diesem Design allerdings festgestellt, nämlich dass an der Seite oft Harz austritt. Insgesamt ist es ein solides 3,5-Sterne-Produkt.
Shynek 19 Styles Polyhedral Spiel Würfel Formen Set - Beste Wahl
- Hat in der Regel alles, was Sie brauchen, um mit der Herstellung von Resin-Würfeln zu beginnen
- Erschwinglich und einfach zu bedienen
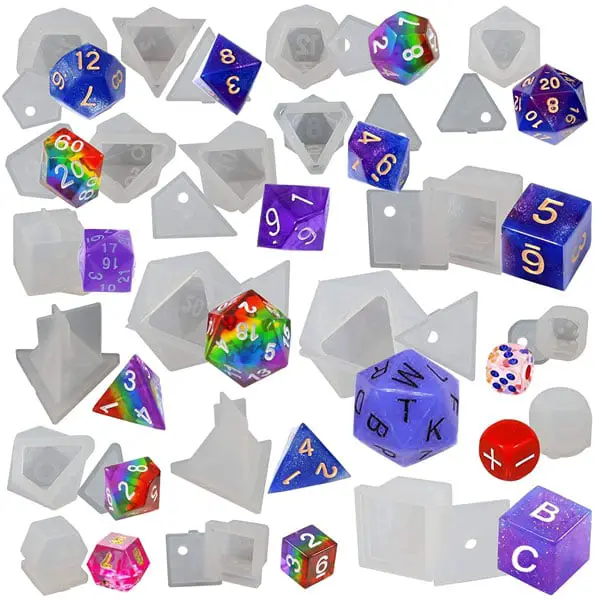
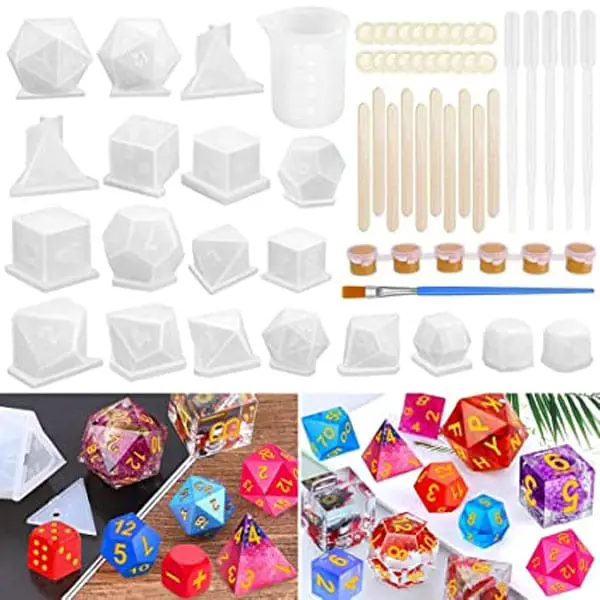
Wenn Sie auf der Suche nach einem Würfelformensatz sind, der alles hat, können Sie mit dem Shynek 19 Styles Polyhedral Game Dice Molds Set nichts falsch machen.
Das Paket enthält alles, was ein DIY-Würfelmacher braucht, um hochwertige Würfel herzustellen:
- 19 Stück Silikonformen für Würfel
- 5 Stück Kunststofftropfer
- 1 Stück 100 ml Messbecher
- 6er Set goldfarbener Acrylfarben
- 1 Stück Pinsel
- 20 Stück Fingerlinge
- 10 Stück Rührstäbchen
Es ist ein solides 4,2-Sterne-Produkt.
Juanya 19 Styles Silikonharz Gießformen - Bestes Budget
- Einfaches Design
- Erschwinglich
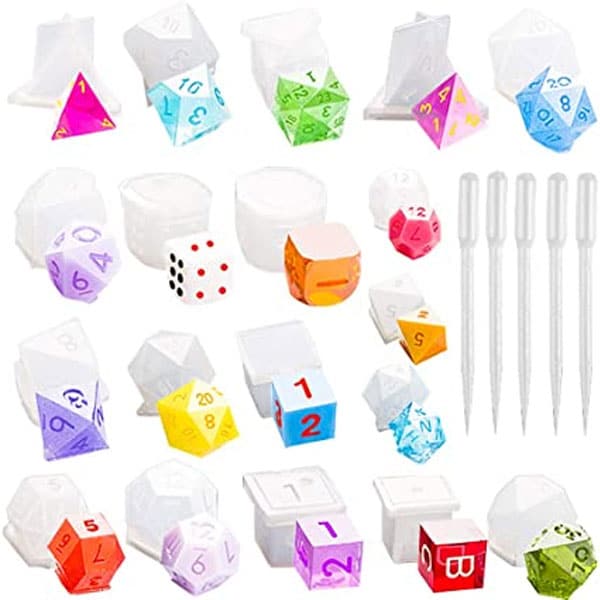
Diese Form ist ehrlich gesagt nicht die beste, aber wenn man ein kleines Budget hat, kann man damit auskommen, bis man genug gespart hat, um eine bessere vorgefertigte Form zu kaufen.
Das Set enthält:
- 19 mehrflächige Harzformen
- 5 Kunststofftropfer
Er besteht aus hochwertigem Silikon und ist flexibel, so dass er nicht bricht, wenn man versucht, die Würfel nach dem Werfen herauszuziehen.
Wie man mehrflächige Harzwürfel herstellt
Nachdem wir nun alles besprochen haben, was zur Herstellung von Würfeln aus Resin gehört, ist es an der Zeit, mit dem Gießen zu beginnen!
Verwendung von Verschlussformen
Schritt 1
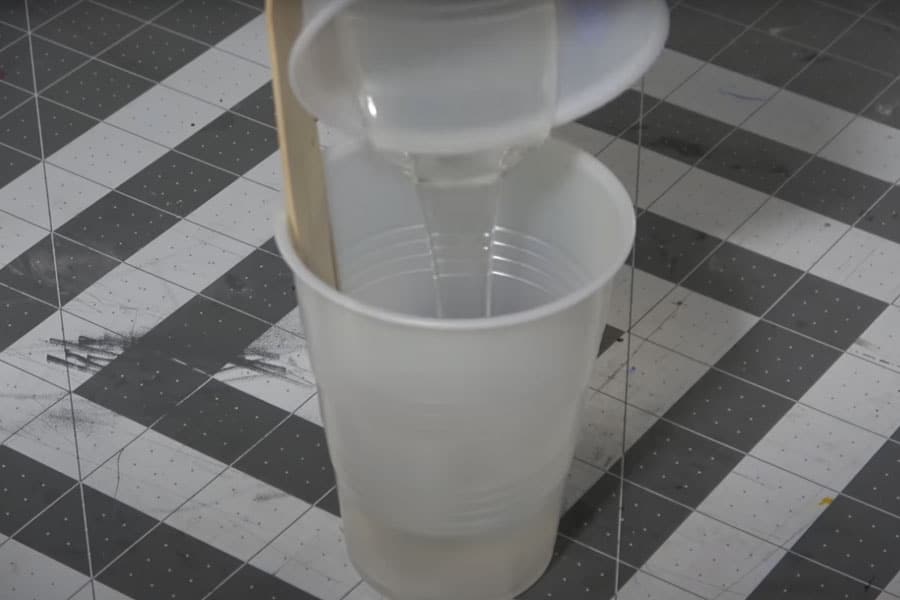
Ziehen Sie zur Sicherheit Handschuhe und eine Atemschutzmaske an. Nehmen Sie gleiche Teile Ihrer Art 'n Glow Resin-Mischungen A und B und vermischen Sie sie in einem Behälter. Wir empfehlen, einen Silikonbecher zum Mischen zu verwenden, aber wenn Sie keinen zur Verfügung haben, reicht auch ein Plastikbecher.
Schritt 2
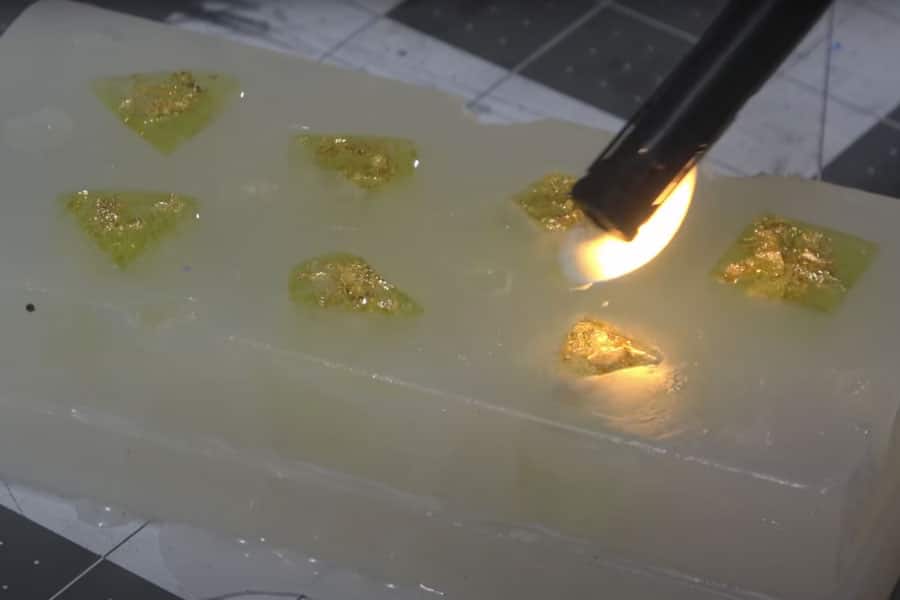
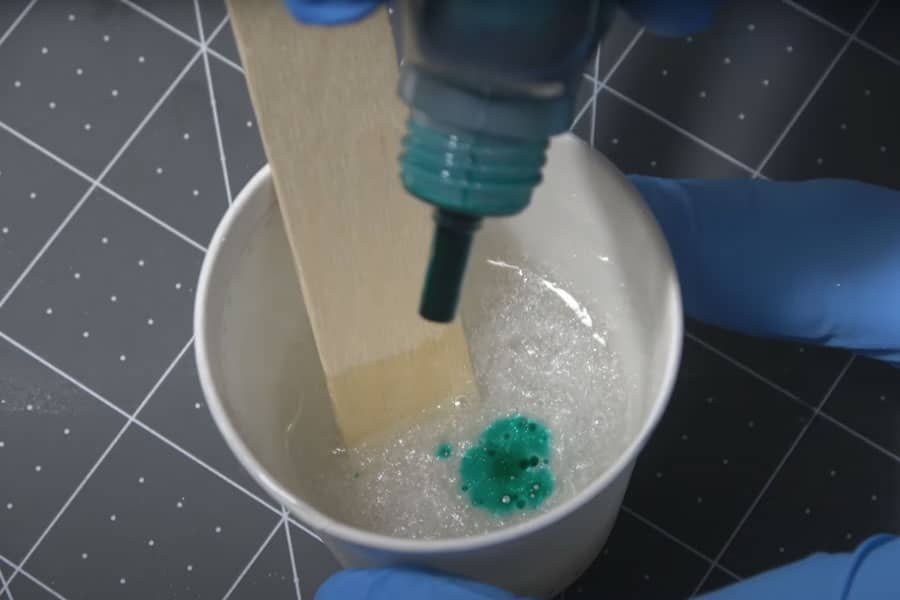
Fügen Sie Ihre Farben sowie andere Verzierungen, z. B. Glitter, Folie, Konfetti usw., hinzu und mischen Sie sie unter Ihr Harz.
Schritt 3
Wenn Sie alles gut vermischt haben, gießen Sie einfach Ihr Silikon in Ihre Form. Sie sollten so viel Harz hinzufügen, dass es fast wie eine Kuppel aussieht.
Schritt 4
Wenn du einen Drucktopf hast, kannst du ihn zum Aushärten deines Harzes verwenden. 12 Stunden bei 40 - 50 psi lassen. Sobald das Harz ausgehärtet ist, kannst du deine Form herausnehmen und deine Würfel langsam entformen.
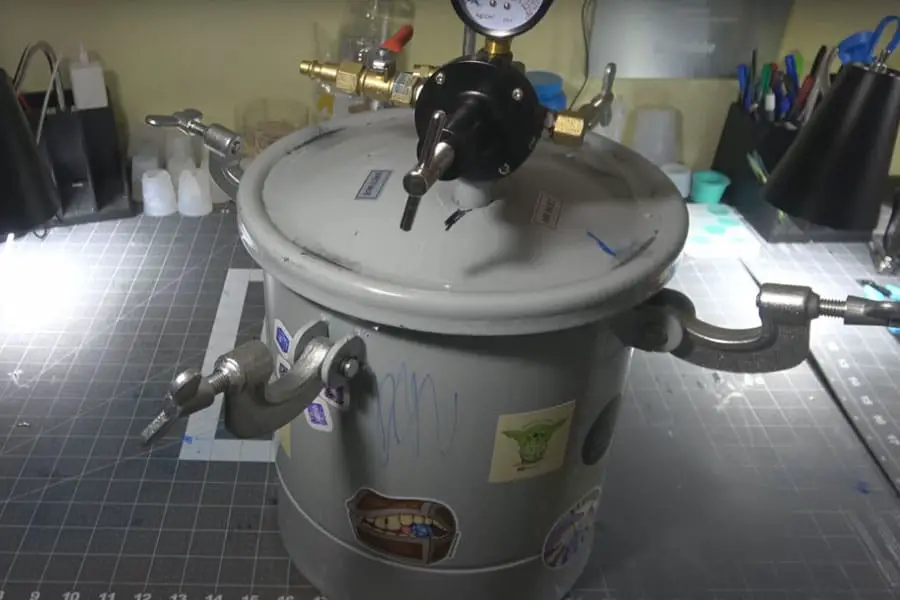
Sie können auf den Drucktopf verzichten, wenn Sie keinen zu Hause haben. Wir müssen Sie jedoch warnen, wenn Sie Ihr Harz draußen lassen, damit es "natürlich" in Ihrer Kappenform aushärtet, kann dies zu mehr Blasen und zerbrechlicheren Würfeln führen. Da Kappenformen nicht über eine angemessene Belüftung verfügen, sammelt sich die Luft einfach in der Form, und das Ergebnis kann sehr unschön werden.
Fehler und zu vermeidende Dinge bei der Verwendung von Kappenformen
- Drücken Sie nicht auf die Kappe, sonst bilden sich Blasen auf den Würfeln, und das wollen Sie nicht.
- Legen Sie Wachs- oder Gefrierpapier unter die Form, um überschüssiges Harz aufzufangen, das an den Seiten überlaufen könnte.
Verwendung von Angussformen
Schritt 1
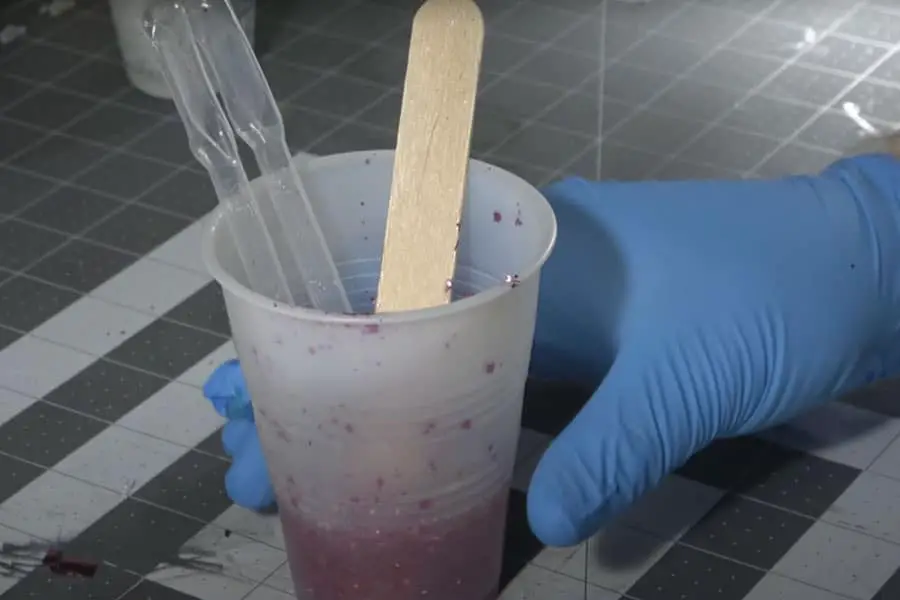
Bereiten Sie Ihr Harz vor, wie wir es im vorherigen Kapitel getan haben.
Schritt 2
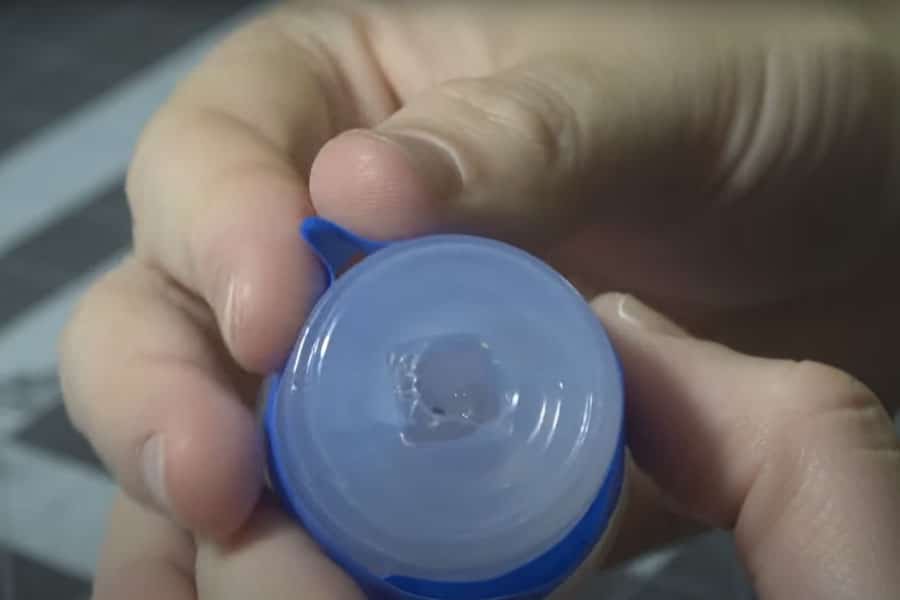
Besorgen Sie sich blaues Malerband (oder Gummibänder, wenn Sie das bevorzugen) und befestigen Sie die Angussform gut.
Schritt 3
Verwenden Sie eine Pipette, um Ihr Harz in Ihre Form zu gießen. Sie können dies auch ohne Pipette tun, aber mit der Pipette können Sie sicherstellen, dass Ihr Harz nicht an den Rändern ausläuft. Es ist ratsam, Ihre Form ein wenig zu überfüllen. Wenn Sie sie zum Aushärten in den Drucktopf stellen, können die entstehenden Blasen eine hässliche Lücke in Ihrem Würfel hinterlassen, wenn kein überschüssiges Harz zur Verstärkung Ihrer Struktur übrig bleibt.
Schritt 4
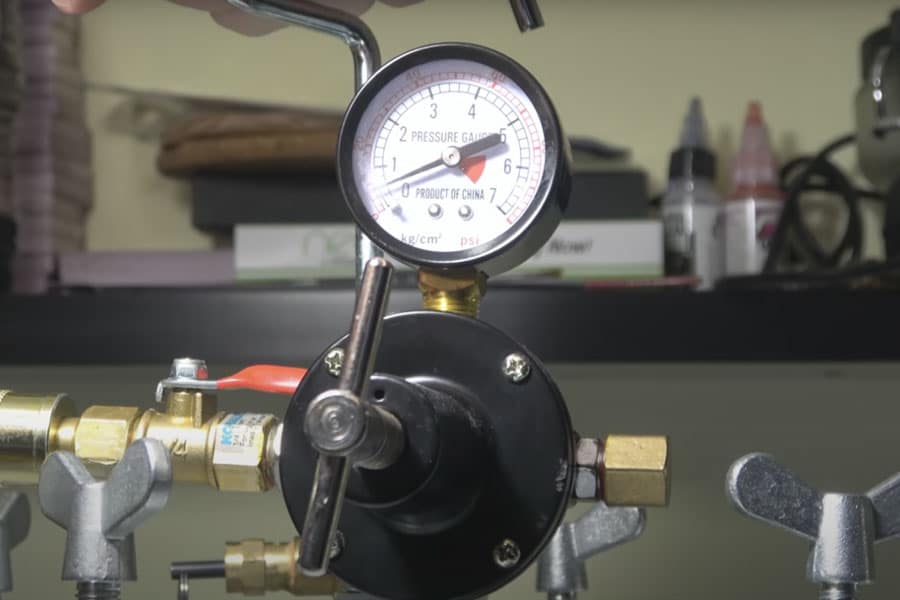
Legen Sie die Formen in den Druckbehälter und lassen Sie sie etwa 12 Stunden bei 40-50 PSI aushärten. Danach können Sie die Formen herausnehmen und die Würfel langsam entformen.
Auch hier gilt: Wenn Sie keinen Drucktopf haben, ist das kein Problem, legen Sie einfach die Angussformen beiseite und warten Sie, bis das Harz vollständig ausgehärtet ist.
Schritt 5
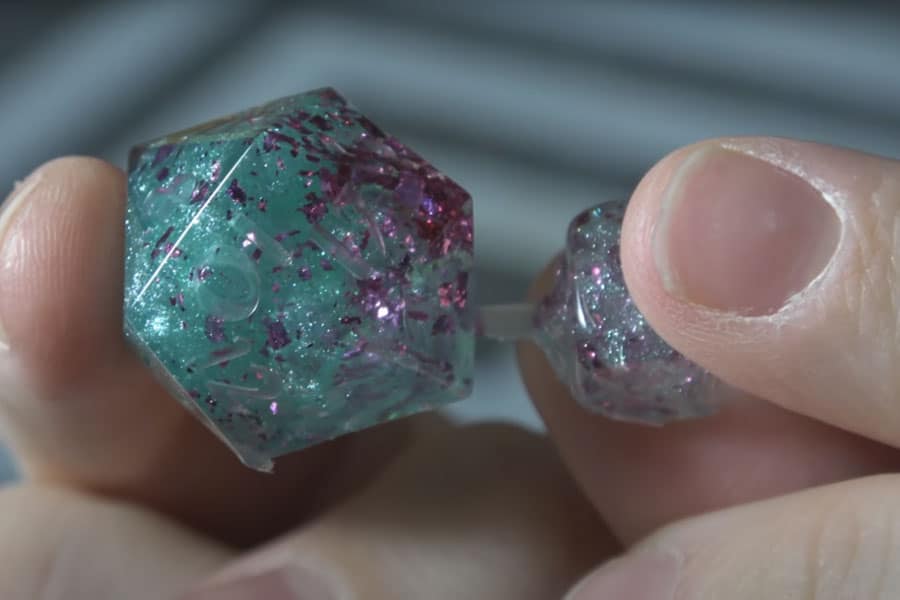
Sobald du alle Würfel aus den Formen genommen hast, kannst du die Angüsse mit einer sauberen Zange abschneiden. Benutze dein Exacto-Messer, um überschüssiges Harz so flach wie möglich zu machen. Nachdem du alles überschüssige Harz entfernt hast, kannst du mit dem Schleifen der Würfel beginnen.
Fehler und zu vermeidende Dinge bei der Verwendung von Angussformen
- Vermeiden Sie auch hier die Verwendung von Gummibändern an den Angussformen, da diese zu einer Verformung der Würfel führen können.
- Vergessen Sie nicht, Ihre Würfel ein wenig zu überfüllen, damit sich während der Gießzeit keine Lücken bilden.
- Nehmen Sie Ihre Würfel nicht zu früh aus der Form! Eine gute Faustregel ist, sie mindestens doppelt oder dreimal so lange in der Form zu lassen wie ihre ursprüngliche Aushärtungszeit. Mit anderen Worten: Wenn die Aushärtungszeit 12 Stunden beträgt, sollten Sie Ihre Würfel mindestens 24 oder 36 Stunden darin lassen.
Schleifen, Polieren und Einfärben Ihrer Würfel
Wenn du mit der Herstellung deiner Würfel fertig bist, musst du sie schleifen und polieren, vor allem, wenn du eine glänzende Oberfläche haben möchtest.
Bei Würfeln, die mit Kappenformen hergestellt werden, ist es selten erforderlich, sie zu schleifen, aber wenn Sie eine Angussform verwenden, sollten Sie Folgendes tun.
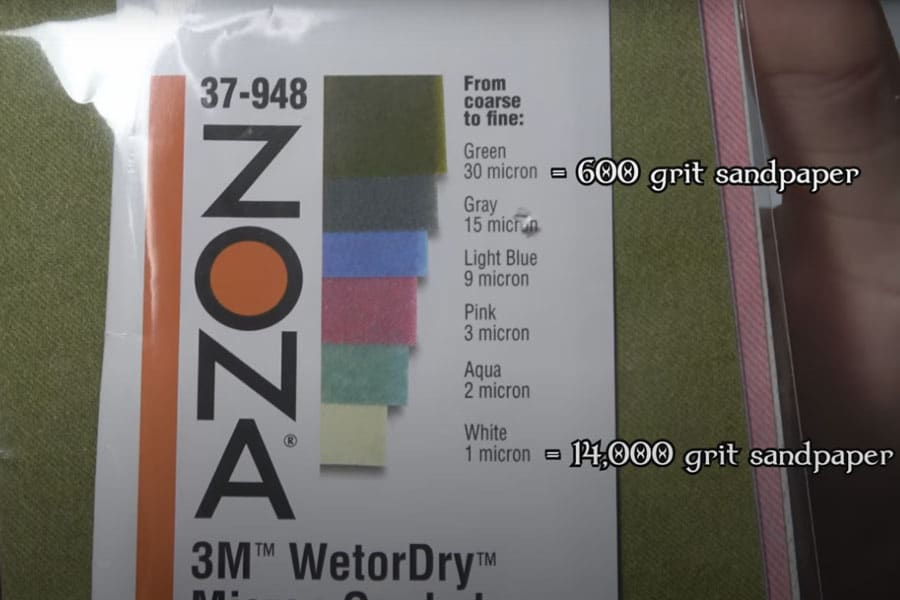
Schneiden Sie zunächst 6 kleine Quadrate von den 6 Schleifpapieren ab. Beginnen Sie damit, die Seite Ihres Würfels mit dem Anguss auf dem 30-Mikron-Schleifpapier zu schleifen. Achten Sie darauf, das Schleifpapier vorher mit etwas Wasser zu tränken, da Sie während des Prozesses keinen Harzstaub einatmen wollen. Machen Sie dies für alle Ihre Würfel mit Angussform.
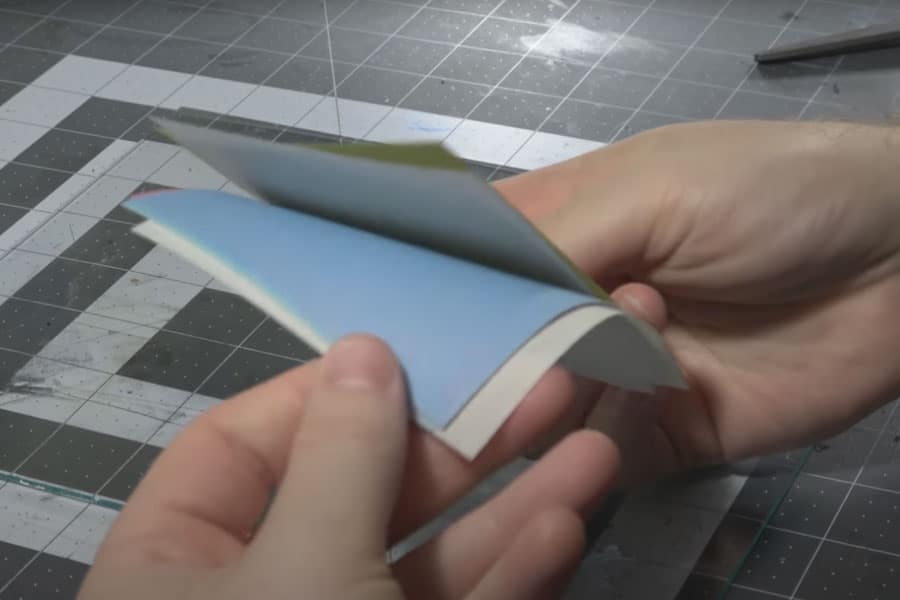
Wenn Sie alle Würfel mit der 30-Mikron-Schleifscheibe geschliffen haben, arbeiten Sie sich auf der Skala nach unten, bis zur 15-Mikron-Schleifscheibe, 9-Mikron-Schleifscheibe und so weiter.
Achten Sie beim Schleifen darauf, dass Sie im Uhrzeigersinn und gegen den Uhrzeigersinn arbeiten, damit die Oberfläche sauberer und gleichmäßiger wird.
Nachdem Sie alle 6-Mikron-Körnungen durchlaufen haben, bleibt diese erstklassige, glasähnliche Politur übrig, die auch für alle anderen Seiten Ihres Würfels gilt.
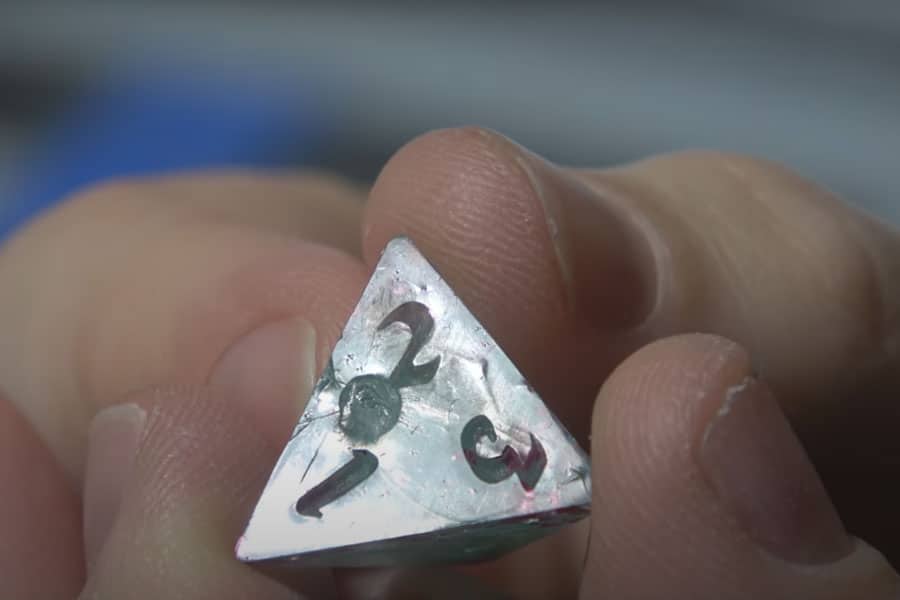
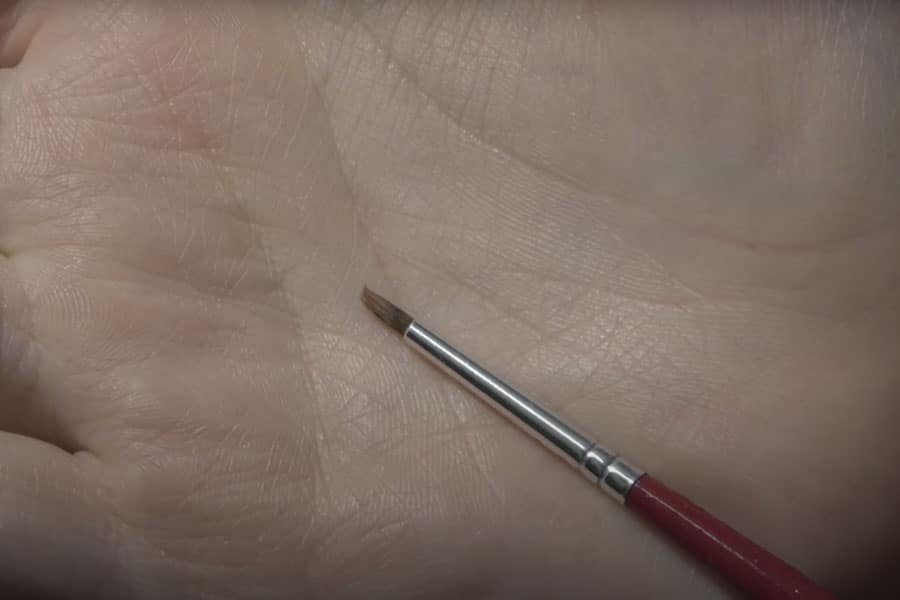
Nehmt einen kleinen Pinsel und eine Farbe eurer Wahl. Wir empfehlen euch Citadel. Ihr müsst sie nicht verwenden, aber da sie eine hohe Pigmentkonzentration haben, sehen sie auf Resin toll aus und können euren Würfeln mehr Charakter verleihen.
Wenn Sie überschüssige Farbe um die Zahlen herum bemerken, nehmen Sie einfach etwas Alkohol, geben Sie ihn auf ein sauberes Tuch und wischen Sie damit die überschüssige Farbe weg.
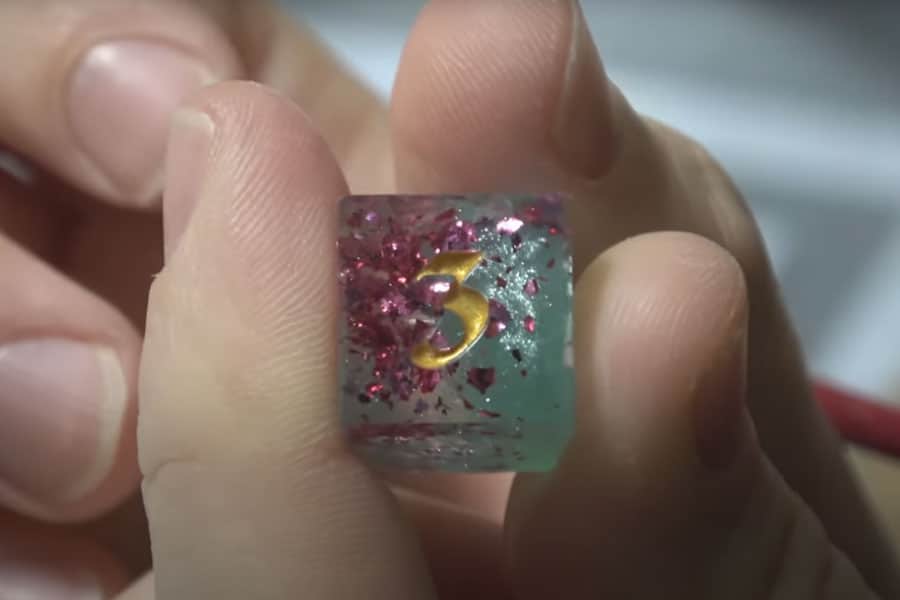
Jetzt hast du ein schickes Würfelset für deinen nächsten Spieleabend!
Experimentieren Sie mit Ihren Verschönerungsoptionen
Es gibt unzählige Möglichkeiten, wie du deinen Würfeln ein einzigartiges Aussehen verleihen kannst: Du kannst Glitzer hinzufügen, verschiedene Farben kombinieren oder sogar kleine Objekte wie eine kleine Schwertfigur in deine Würfel einfügen (obwohl wir die Figur nicht empfehlen, wenn du ein Anfänger bist).
Zweifarbige Würfel
Schritt 1
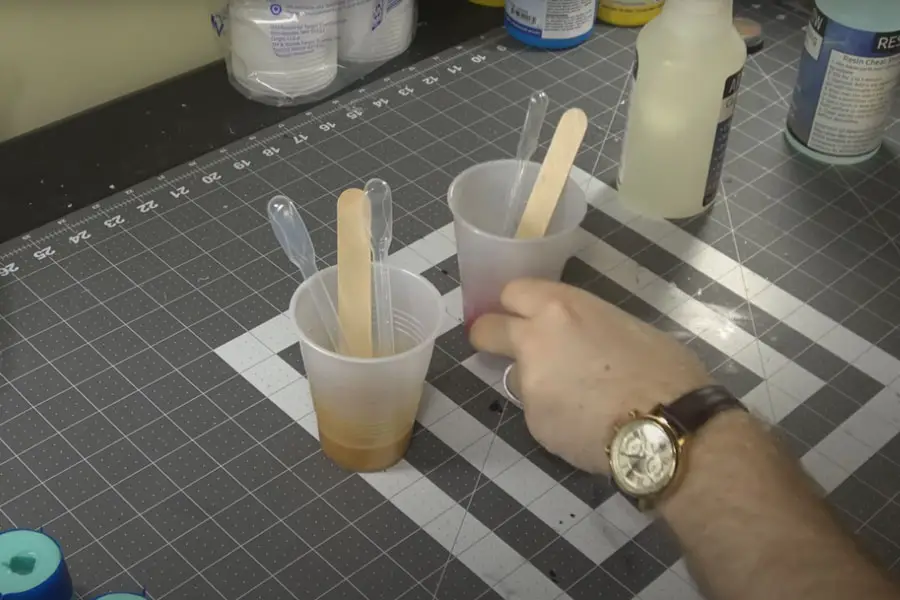
Um zweifarbige Würfel herzustellen, trennen Sie einfach Ihre Harzmischung in zwei Behälter und mischen Sie die gewünschten Farben in jeden Behälter.
Schritt 2
Sobald du 2 Chargen deiner gewünschten Farben hergestellt hast, kannst du deine Tropfer nehmen und beginnen, dein Harz in deine Form zu gießen.
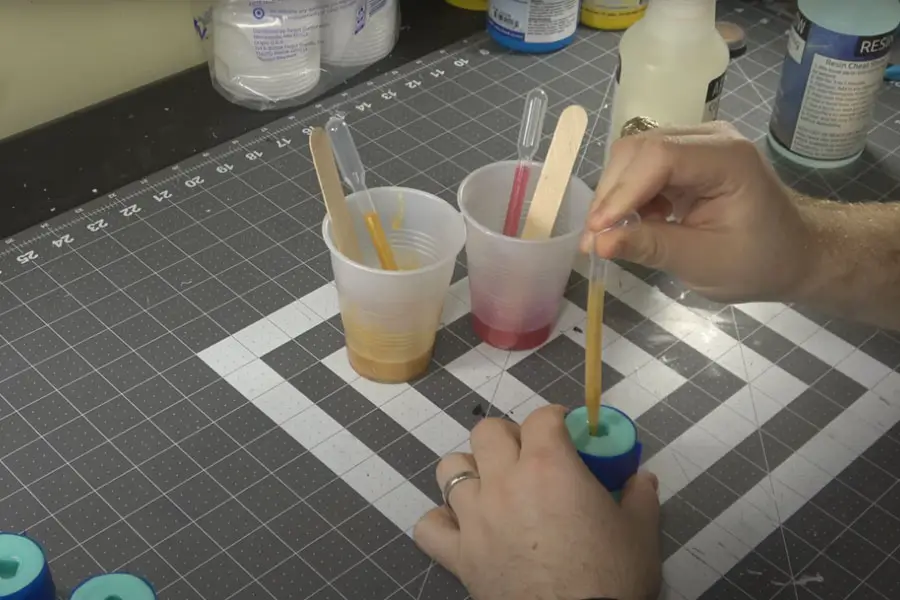
Der Rest der Schritte ist identisch mit denen, die Sie bei der Herstellung Ihrer normalen, einfarbigen Würfel durchführen. Sie können diese Methode sowohl für Angussformen als auch für Kappenformen verwenden.
Im Dunkeln leuchtende Würfel
Das Geheimnis für diese ästhetischen, im Dunkeln leuchtenden Würfel ist dieses Pigmentpulver von HXDZFX, das im Dunkeln leuchtet.
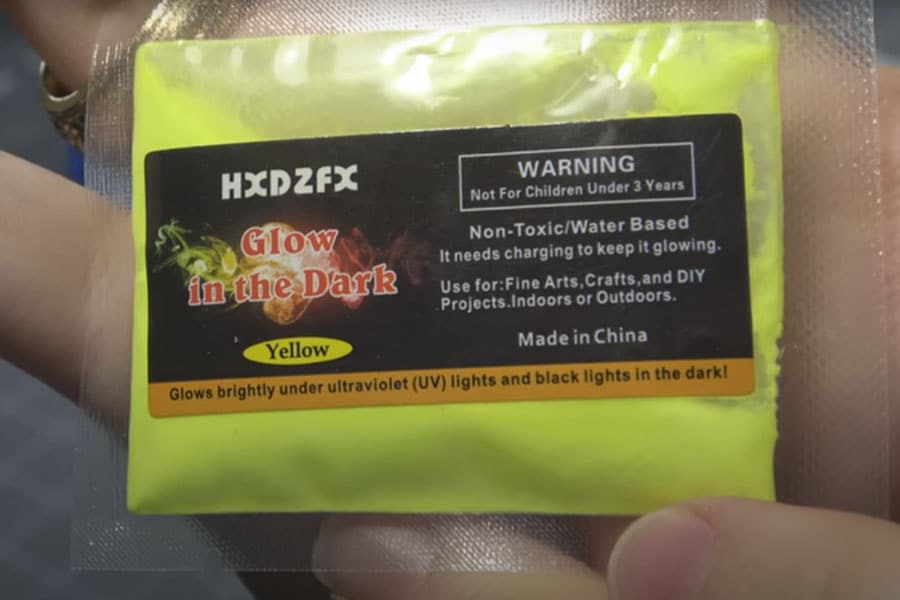
Sie kommen in:
- Blaugrün
- Himmelblau
- Gelb
- Gelb-Grün
- Rosa
- Grüntöne
Sie sind ungiftig, nicht radioaktiv und können mit einer UV-Lampe aufgeladen werden.
Mischen Sie einfach die Hälfte des Beutels in Ihre Harzmischung. 5 Minuten lang mit dem Eisstiel umrühren, dann nehmen Sie Ihren Tropfer und füllen ihn mit Harz auf.
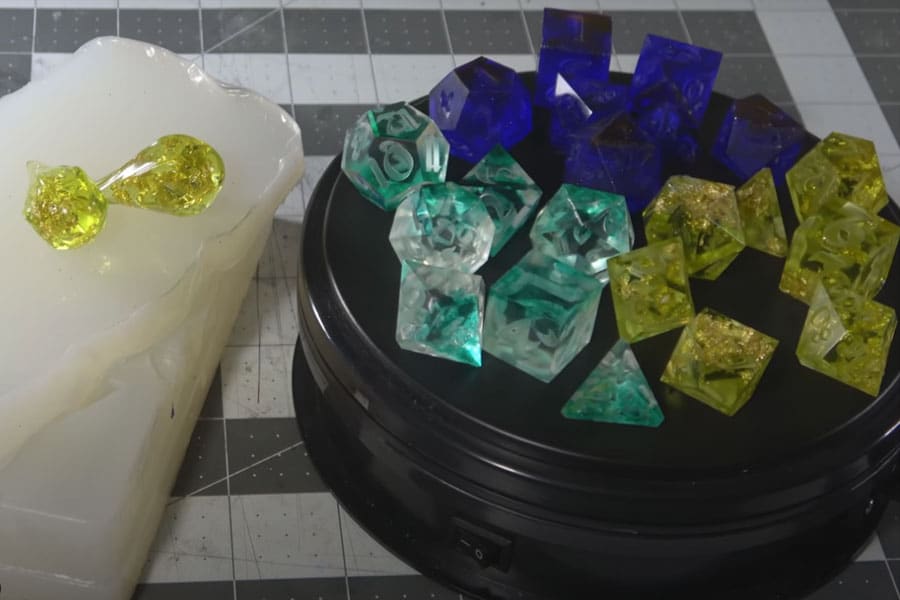
Sie können auch eine Glasurflasche verwenden, wie auf dem Bild unten, wenn Sie keine Tropfer zu Hause haben.
Sobald Ihre Glasurflasche oder Ihr Tropfer gefüllt ist, können Sie das Harz in Ihre Form gießen.
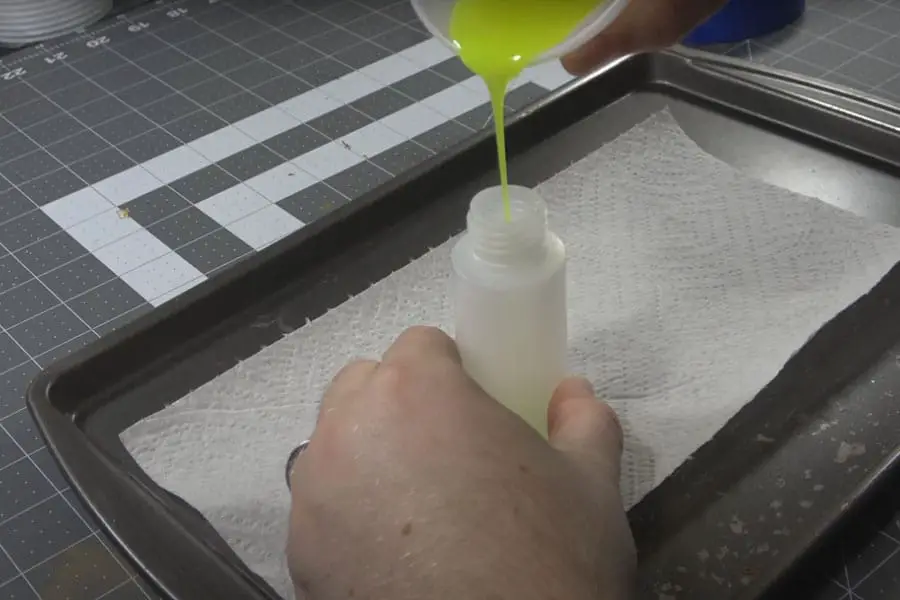
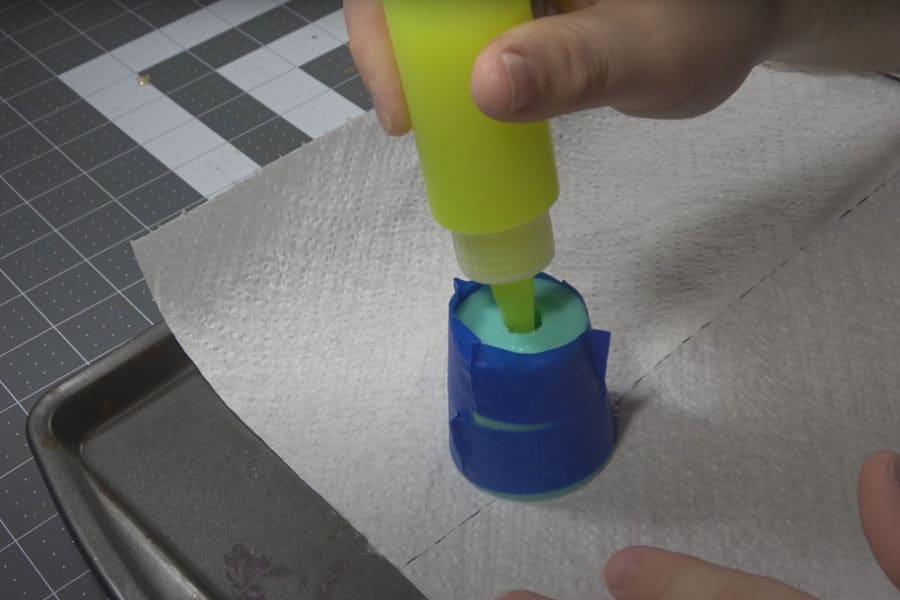
Warten Sie 24 Stunden, bis das Harz ausgehärtet ist, und beginnen Sie dann mit dem Entformen der Würfel. Der Rest des Prozesses ist identisch mit den vorherigen Schritten, die wir besprochen haben.
Würfel mit Blumenmotiven
Dieses Thema funktioniert besonders gut mit Kappenformen, aber du kannst auch deine Angussformen verwenden, wenn du nur diese hast.
Schritt 1
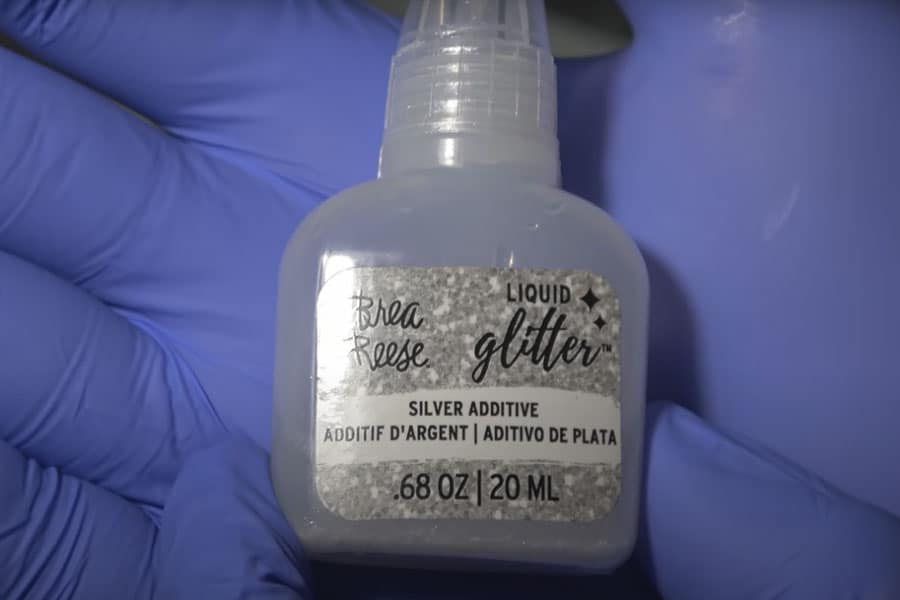
Mischen Sie zunächst Ihr Harz mit der gewünschten Farbe. In diesem Beispiel verwenden wir flüssigen Silberglitter, um den Würfeln etwas Glanz zu verleihen. Sie können jede andere Farbe hinzufügen, solange sie nicht zu undurchsichtig ist und die Blumen verdeckt.
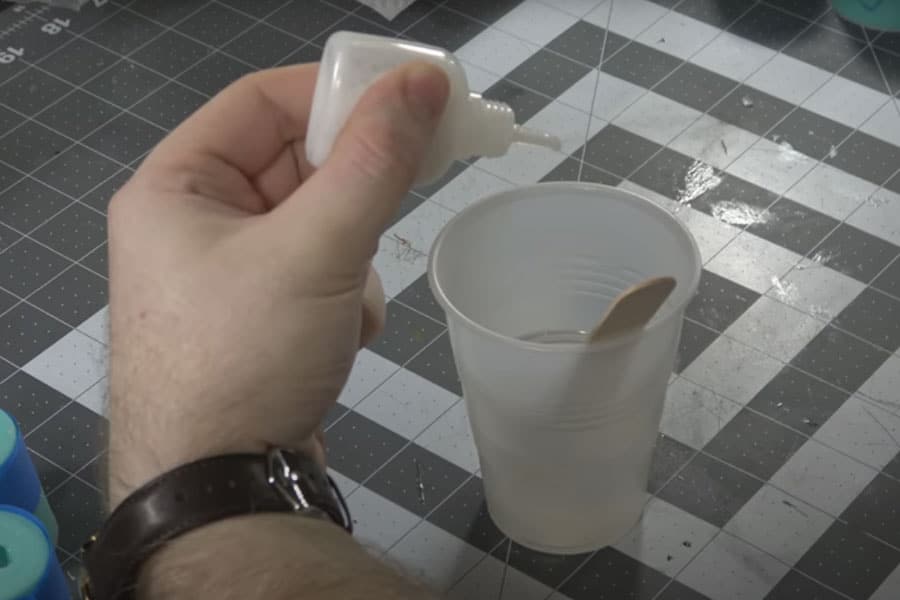
Schritt 2
Nehmen Sie Ihre Pipette und gießen Sie etwas Harz auf den Boden Ihrer Form, aber nur ein wenig - Sie wollen Ihre Form nicht ganz füllen.
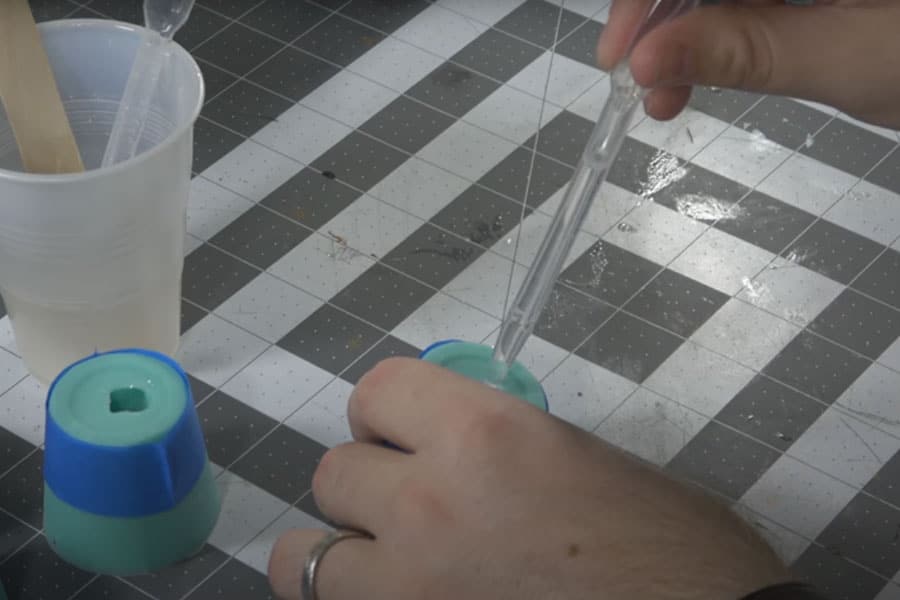
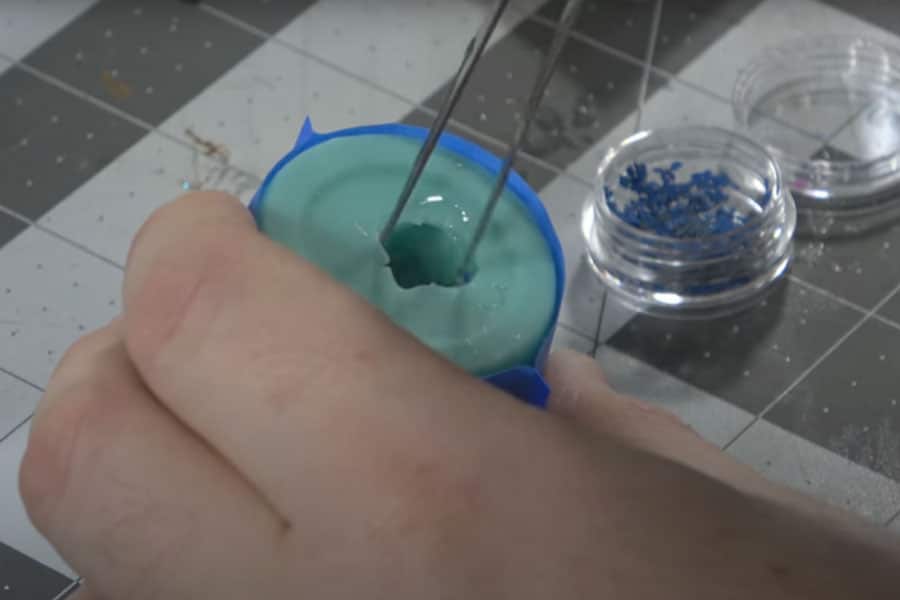
Sobald du genug Harz hast, kannst du deine Blumen einfüllen. Du kannst dies von Hand tun, aber wenn du eine Angussform verwendest, kannst du es mit einer Pinzette machen und deine Blumen langsam in das Angussloch gleiten lassen.
Schritt 3
Nachdem Sie genug Blumen eingefügt haben, können Sie mehr Harz bis zum Rand der Form hinzufügen.
Die nächsten Schritte sind die gleichen wie die zuvor besprochenen, also lesen Sie einfach in diesem Abschnitt nach, wenn Sie mit allem fertig sind.
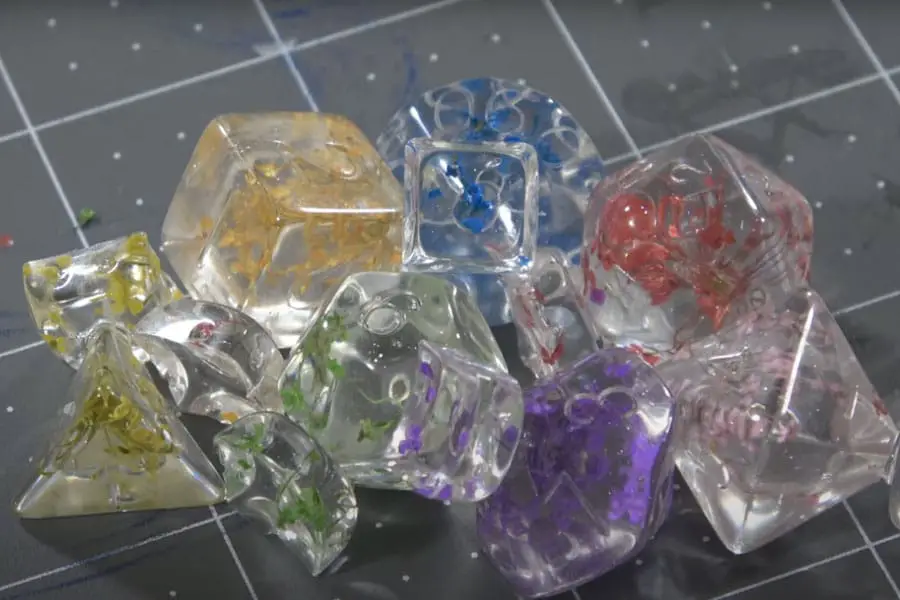
Und jetzt gibt es Würfel mit Blumenmotiven!
Schlussfolgerung
Endlich sind wir am Ende des Artikels angelangt! Wenn du bis hierher gekommen bist, hast du hoffentlich erkannt, wie viel Spaß und Kreativität es macht, deine eigenen Resin-Würfel herzustellen.
Wenn du mehr Kontrolle über die Art und Weise haben willst, wie deine Würfel aussehen und sich anfühlen, dann ist das Selbermachen von Würfeln aus Harz definitiv ein Projekt, das einen Versuch wert ist.
Wenn Sie diesen Artikel hilfreich finden, teilen Sie ihn bitte mit Ihren Freunden. Und wenn Sie der Meinung sind, dass wir etwas Wichtiges ausgelassen haben, teilen Sie uns das bitte in den Kommentaren unten mit.
Wir danken Ihnen für die Lektüre und hoffen, dass wir Ihnen wertvolle Tipps und Tricks für die Herstellung Ihrer eigenen Resin-Würfel geben konnten!